Claude.ai Setup Guide
Open Manage Connectors
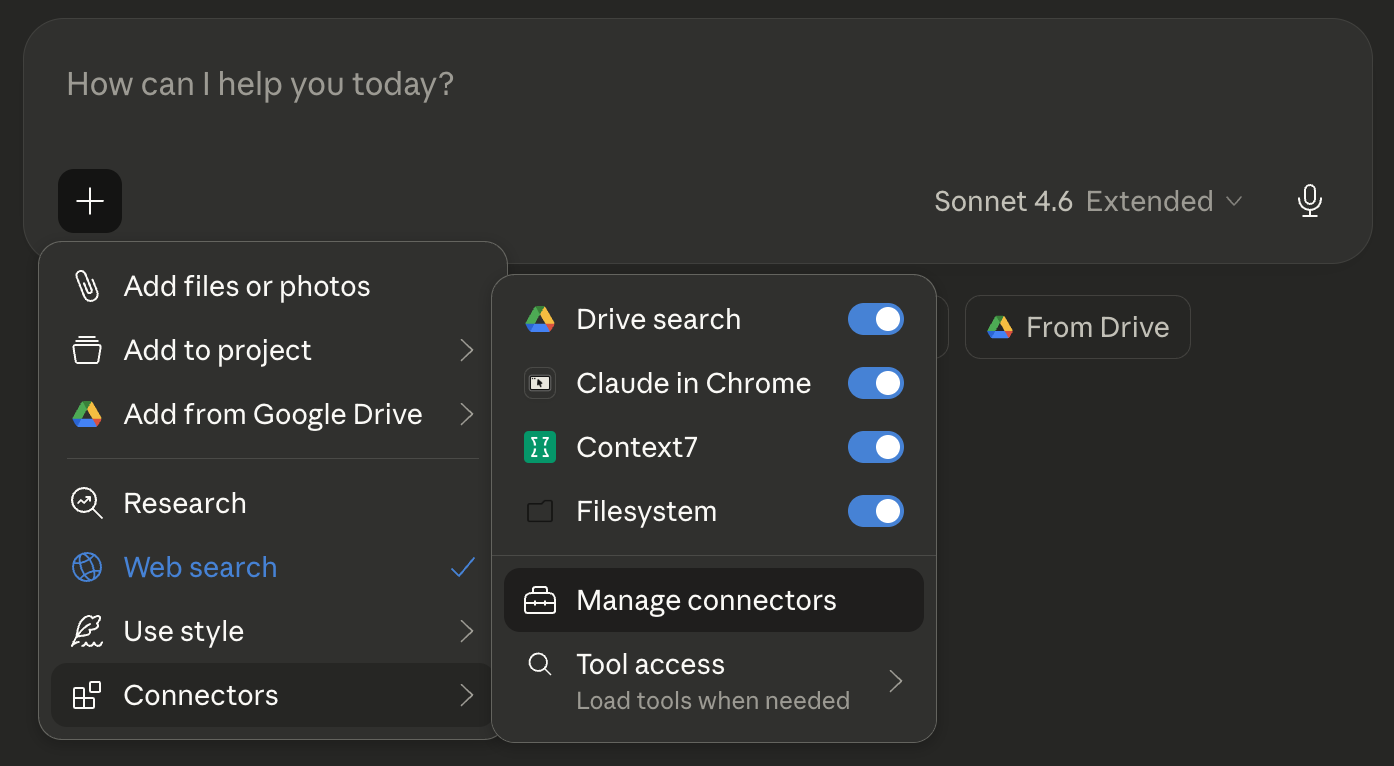
In Claude.ai, click the + button in the chat input, then go to Connectors → Manage connectors.
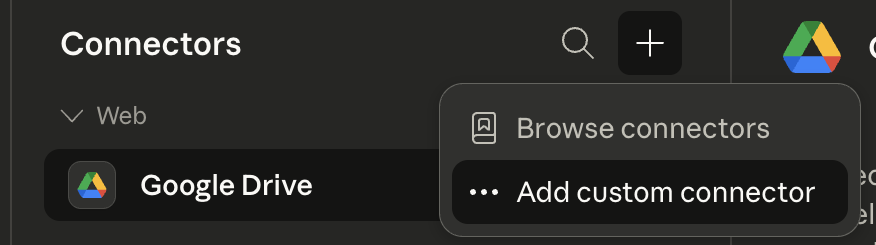
Click + Add custom connector
Click the + icon next to the search bar, then click Add custom connector…
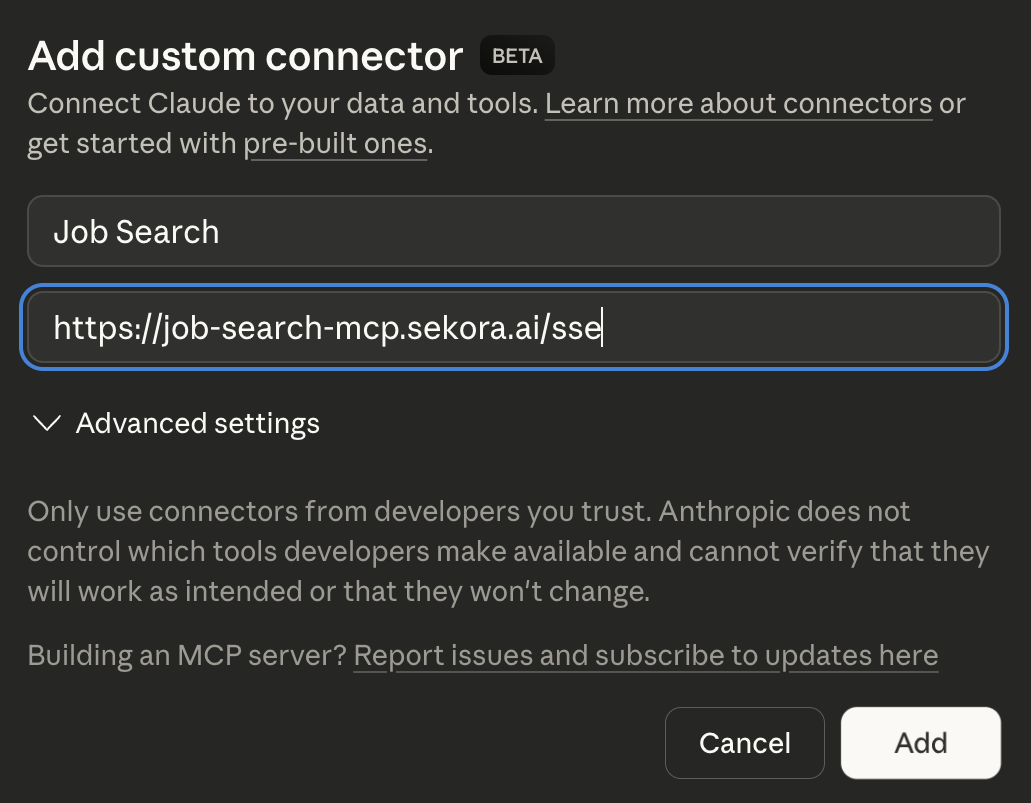
Add custom connector details
Set the name to Job Search and paste the URL below.
https://job-search-mcp.sekora.ai/mcp
Click to copy
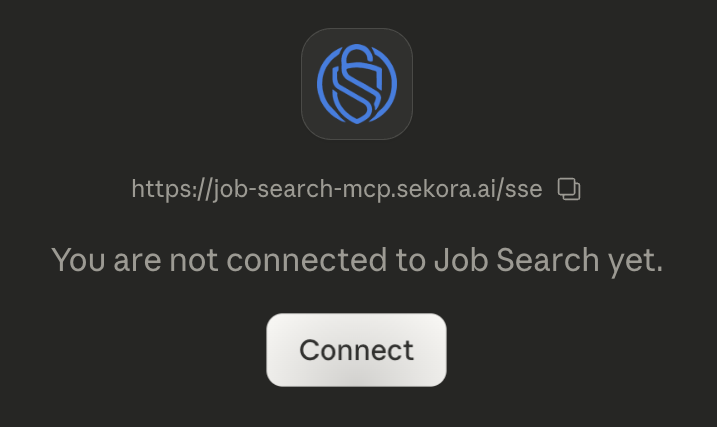
Click Connect
Job Search will appear in your connectors list. Click Connect to proceed.
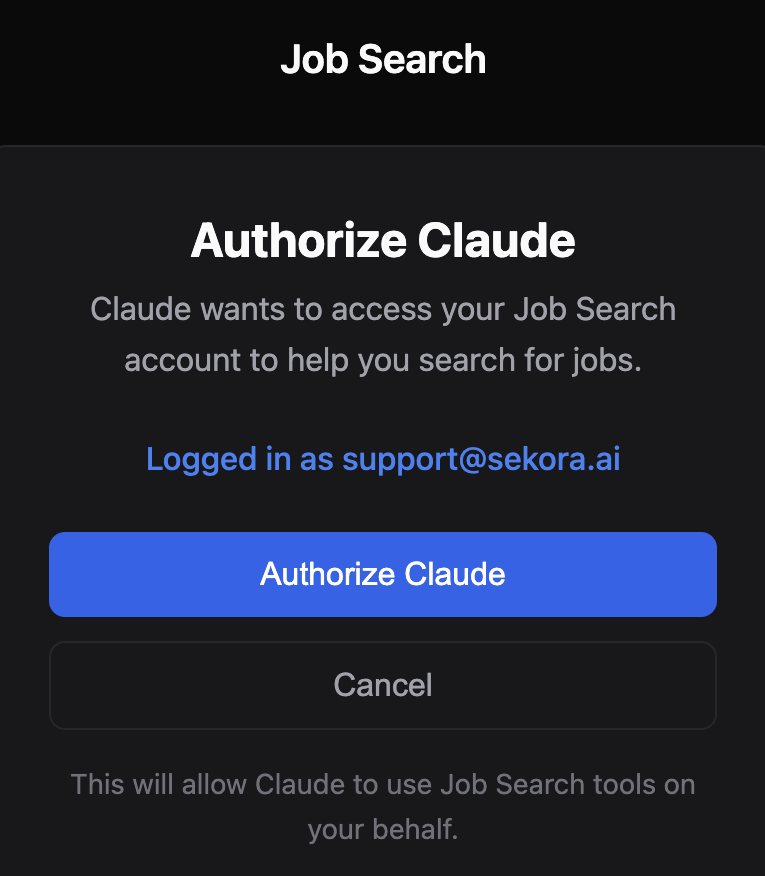
Authorize AI Client
A browser window will open. Click Authorize AI Client to grant access to your Job Search account.
Start Searching
You're all set! Start a new conversation and ask your AI to find jobs for you:
"find jobs that match the LinkedIn profile"
"find jobs that match the attached resume"
"what companies are hiring for developer experience?"
"the Staff Software Engineer role seems interesting...tell me more"
MCP Server Configuration
To use Job Search with any MCP-compatible client, add the following to your MCP configurations file:
Add to your MCP config
{
  "mcpServers": {
    "job-search": {
      "command": "npx",
      "args": ["-y", "mcp-remote", "https://job-search-mcp.sekora.ai/mcp"]
    }
  }
}Restart Client
Authorize on first use
The first time you use a Job Search tool, a browser window will open to authorize your account. Complete the flow and you're ready to go.
Ready to enhance your job search?
Get started with a 7-day free trial and connect Job Search to your AI client in under a minute.